


Showing posts with label re-purposed. Show all posts
Showing posts with label re-purposed. Show all posts
Tuesday, August 7, 2012
Dust off your sweaters and wraps and hit the road...
It's that time of year again...I'm prepping the painting for the fall sale...October 12 & 13...invite your friends and make it a day.


Wednesday, May 23, 2012
Sew, a needle pulling thread...
Now that I've given you this line in a Sound of Music song, I'm sure you won't be able to get it out of your head for days like me. Any-who...this post is not really about sewing, but sewing stools. I came across two darling sewing stools, with "under-the-lid" storage last year at a garage sale but didn't have enough time to paint them before the fall sale. Of course they've been in my barn since then, and I just found them tonight after work! Mind you, I didn't get home from work until 5:45pm...and didn't get out into the garage until after 6pm to start this project.
I decided I wanted to paint them creamy white, but of course needed to decide what to re-cover the seat with. Then I remembered I had two of these:
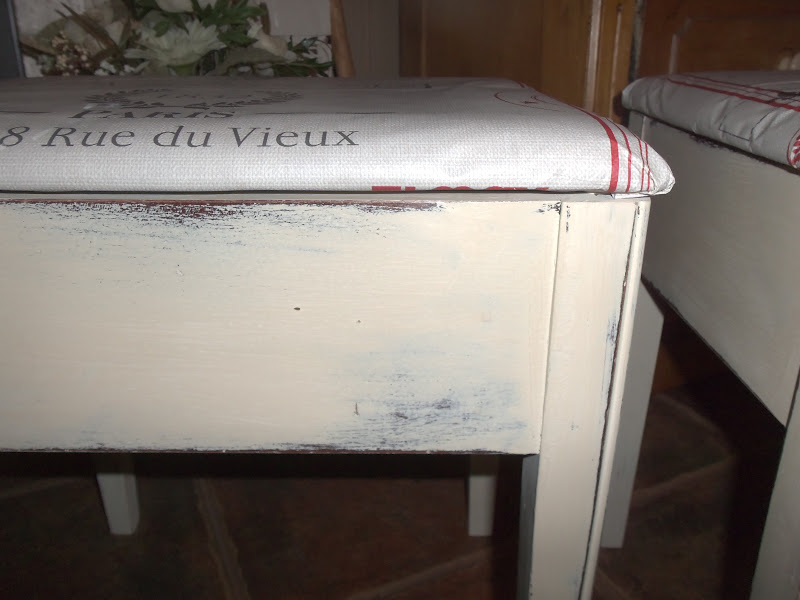
Don't you just love TJMaxx bags? Me too! A few weeks ago I picked up a couple of their $.99 gift bags at the cash register. I didn't need them for gifts, but the design was so fun I grabbed them knowing I could eventually use them to re-cover something. So next I grab my Annie Sloan Chalk Paint in Old Ochre and went to work.

After one coat of paint, distressing, one coat of clear wax and only 90 minutes later, this is what I got...


Sew, do you know all the words to the song by now (I know you've been humming it)? As a kid I'm sure I saw the movie at least a dozen times...and we had the album (yes, an album...you know, the round vinyl record) that I played over and over on our stereo console. Sew, from memory, without looking it up, I believe the words are:
Do, a deer, a female deer
Ra, a drop of golden sun
Mi, a name I call myself
Fa, a long long way to run.
So, a needle pulling thread,
La, a note to follow So,
Ti, a drink with jam and bread
That will bring us back to Do!
Do-Re-Mi-Fa-So-La-Ti-Do
Do-Ti-La-So-Fa-Mi-Ra-Do
Link up to Tuesday's Cowgirl Up Creative Link Party

 |
| Before shot...after I've removed one of the lids. |
 |
| Add caption |

After one coat of paint, distressing, one coat of clear wax and only 90 minutes later, this is what I got...

 |
| And the fabric is vinyl--so easy to clean--great for sewing, toys, magazines or papers. |

 |
| These little beauties will be for sale at my barn sale in June. |
Sew, do you know all the words to the song by now (I know you've been humming it)? As a kid I'm sure I saw the movie at least a dozen times...and we had the album (yes, an album...you know, the round vinyl record) that I played over and over on our stereo console. Sew, from memory, without looking it up, I believe the words are:
Do, a deer, a female deer
Ra, a drop of golden sun
Mi, a name I call myself
Fa, a long long way to run.
So, a needle pulling thread,
La, a note to follow So,
Ti, a drink with jam and bread
That will bring us back to Do!
Do-Re-Mi-Fa-So-La-Ti-Do
Do-Ti-La-So-Fa-Mi-Ra-Do
Link up to Tuesday's Cowgirl Up Creative Link Party
Tuesday, April 24, 2012
Problem Solved...
I just re-decorated my tiny master bathroom but wasn't thrilled with any of the choices for toilet paper holders that I found in my local box stores. (You can see the finished bathroom project here.) You see, I like to use incorporate re-purposed items as often as I can, and I thought the bathroom is the perfect place for that. After spending weeks of listening to my husband complain question when I was planning to get one, I finally hit on the perfect item. I remembered a pair of vintage extending curtain rods that I had stashed in the hall closet. I had no where to use them, but hated to get rid of them (you know how that goes). So, a drill and two screws later and wa-la! Problem solved. (I'm thinking maybe the matching rod would make a cute towel holder!)


Friday, April 13, 2012
Dog Gone!
As many of you have seen from past posts, I have a silly dog who follows me everywhere. Her name is Macy, and she is glued to my hip.


I love her to death, but when we leave the house, I don't fully trust her...on the carpeting. When we first got her, I used to put her in her crate when we'd leave the house, but it breaks my heart to do that...and, it's very difficult to decorate around a dog crate. You know what I'm sayin? So now I pen her up in our family room which has a tile floor. If she has an accident while we're gone it's no big deal to clean up. My dilemma has always been this...I have two doorways leading into this space...one from the dining room and one from the hallway. The dining room doorway is a normal width, so I use a lovely baby gate at that door (getting rid of the baby gate is next on my list). But the door at the hallway is four feet wide, and I've struggled for years on what to use as a "gate" to keep her penned in. It had to something that looked half way decent...and a whole lot better than a baby gate!
After many makeshift gates, here's what I came up with today...a vintage shutter gate!


I wanted to make sure that when I folded the entire gate back out of the way, it would fold like an accordian-type movement...flat up to the wall. In order to achieve this, I had to remove the hinges from the edges of the shutters and instead attach them to the flat front/back surface. (I realized later that I should have removed the hinges first before I painted). I pre-drilled the holes for my screws, and then re-attached the hinges, alternating the folding mechanism on each shutter. I came up short on screws, so I only used two screws per hinge instead of four.

And here's the finished product...I love it, but Macy? Not so much!


I love her to death, but when we leave the house, I don't fully trust her...on the carpeting. When we first got her, I used to put her in her crate when we'd leave the house, but it breaks my heart to do that...and, it's very difficult to decorate around a dog crate. You know what I'm sayin? So now I pen her up in our family room which has a tile floor. If she has an accident while we're gone it's no big deal to clean up. My dilemma has always been this...I have two doorways leading into this space...one from the dining room and one from the hallway. The dining room doorway is a normal width, so I use a lovely baby gate at that door (getting rid of the baby gate is next on my list). But the door at the hallway is four feet wide, and I've struggled for years on what to use as a "gate" to keep her penned in. It had to something that looked half way decent...and a whole lot better than a baby gate!

It was easy...I collected eight shutters from the Re-Store store...a whopping $1 per shutter! I purposely wanted different heights and widths. I rummaged through my extensive collection of spray paint, and decided on light blue, turquoise, granny smith green, white linen and navy blue.

I lined the shutters all up on my make shift paint table (an extension ladder spread out over two saw horses) and started spraying. I didn't worry about 100% coverage. I was going for a rustic, worn look anyway.


I wanted to make sure that when I folded the entire gate back out of the way, it would fold like an accordian-type movement...flat up to the wall. In order to achieve this, I had to remove the hinges from the edges of the shutters and instead attach them to the flat front/back surface. (I realized later that I should have removed the hinges first before I painted). I pre-drilled the holes for my screws, and then re-attached the hinges, alternating the folding mechanism on each shutter. I came up short on screws, so I only used two screws per hinge instead of four.

And here's the finished product...I love it, but Macy? Not so much!

Subscribe to:
Posts (Atom)