


Showing posts with label salvage. Show all posts
Showing posts with label salvage. Show all posts
Tuesday, August 7, 2012
Dust off your sweaters and wraps and hit the road...
It's that time of year again...I'm prepping the painting for the fall sale...October 12 & 13...invite your friends and make it a day.


Friday, April 13, 2012
Dog Gone!
As many of you have seen from past posts, I have a silly dog who follows me everywhere. Her name is Macy, and she is glued to my hip.


I love her to death, but when we leave the house, I don't fully trust her...on the carpeting. When we first got her, I used to put her in her crate when we'd leave the house, but it breaks my heart to do that...and, it's very difficult to decorate around a dog crate. You know what I'm sayin? So now I pen her up in our family room which has a tile floor. If she has an accident while we're gone it's no big deal to clean up. My dilemma has always been this...I have two doorways leading into this space...one from the dining room and one from the hallway. The dining room doorway is a normal width, so I use a lovely baby gate at that door (getting rid of the baby gate is next on my list). But the door at the hallway is four feet wide, and I've struggled for years on what to use as a "gate" to keep her penned in. It had to something that looked half way decent...and a whole lot better than a baby gate!
After many makeshift gates, here's what I came up with today...a vintage shutter gate!


I wanted to make sure that when I folded the entire gate back out of the way, it would fold like an accordian-type movement...flat up to the wall. In order to achieve this, I had to remove the hinges from the edges of the shutters and instead attach them to the flat front/back surface. (I realized later that I should have removed the hinges first before I painted). I pre-drilled the holes for my screws, and then re-attached the hinges, alternating the folding mechanism on each shutter. I came up short on screws, so I only used two screws per hinge instead of four.

And here's the finished product...I love it, but Macy? Not so much!


I love her to death, but when we leave the house, I don't fully trust her...on the carpeting. When we first got her, I used to put her in her crate when we'd leave the house, but it breaks my heart to do that...and, it's very difficult to decorate around a dog crate. You know what I'm sayin? So now I pen her up in our family room which has a tile floor. If she has an accident while we're gone it's no big deal to clean up. My dilemma has always been this...I have two doorways leading into this space...one from the dining room and one from the hallway. The dining room doorway is a normal width, so I use a lovely baby gate at that door (getting rid of the baby gate is next on my list). But the door at the hallway is four feet wide, and I've struggled for years on what to use as a "gate" to keep her penned in. It had to something that looked half way decent...and a whole lot better than a baby gate!

It was easy...I collected eight shutters from the Re-Store store...a whopping $1 per shutter! I purposely wanted different heights and widths. I rummaged through my extensive collection of spray paint, and decided on light blue, turquoise, granny smith green, white linen and navy blue.

I lined the shutters all up on my make shift paint table (an extension ladder spread out over two saw horses) and started spraying. I didn't worry about 100% coverage. I was going for a rustic, worn look anyway.


I wanted to make sure that when I folded the entire gate back out of the way, it would fold like an accordian-type movement...flat up to the wall. In order to achieve this, I had to remove the hinges from the edges of the shutters and instead attach them to the flat front/back surface. (I realized later that I should have removed the hinges first before I painted). I pre-drilled the holes for my screws, and then re-attached the hinges, alternating the folding mechanism on each shutter. I came up short on screws, so I only used two screws per hinge instead of four.

And here's the finished product...I love it, but Macy? Not so much!

Friday, January 6, 2012
Orange & Turquoise
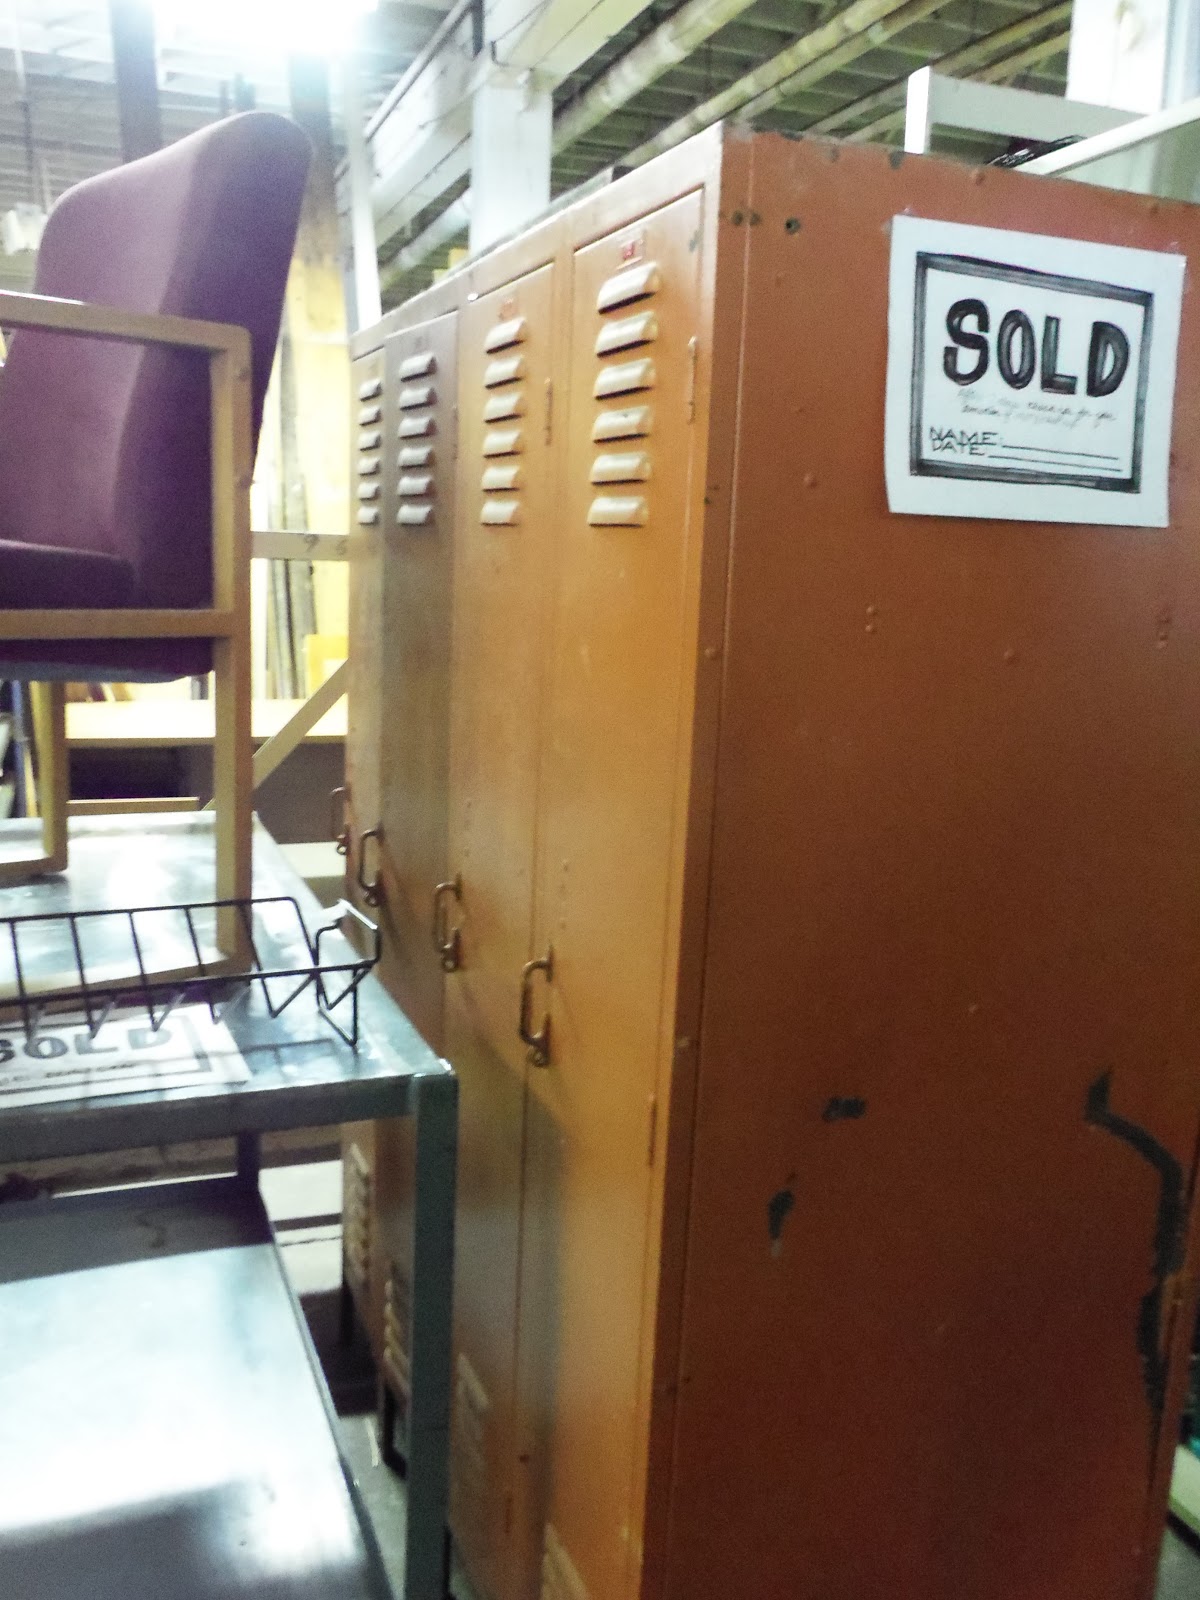
I visited one of my favorite salvage stores yesterday with my husband and hit the motherload! I bought this fabulous set of gym lockers. They are fantastic...set of 8 lockers, four on each side back-to-back! And, even better, they are painted orange! These would be perfect for someone's mudroom, laundry or kids play room. Sorry I couldn't get a better shot...there was too much stuff in the way. I can take another when we get them home. Give me a call or facebook me if you're interested in them for yourself! Or, if you're putting a gym in your house, they also had a locker room bench that was to die for...it was at least 15 feet long...maybe longer...and way only $30 (I think, maybe a bit more, but such a steal). It's the kind just like at school, three metal legs that bolt to the floor, with a padded vinyl seat. It was superb!
My locker unit is only $175 for the unit of 8...call me at 815-742-4498. UPDATE: THESE LOCKERS SOLD BEFORE I EVEN GOT THEM HOME! GWEN FROM MEYERS CANINE COLONY BOUGHT THEM FOR HER SHOP!


Something I didn't buy, but would have if I had somewhere to put it is this rockin' turquoise stove! It's still at the salvage shop, waiting for the perfect gal to come along! It's the cutest thing...it's definitely turquoise (my photos looks a little on the powder blue side), electric with clock. Only $100...somebody please buy her!


My locker unit is only $175 for the unit of 8...call me at 815-742-4498. UPDATE: THESE LOCKERS SOLD BEFORE I EVEN GOT THEM HOME! GWEN FROM MEYERS CANINE COLONY BOUGHT THEM FOR HER SHOP!

Something I didn't buy, but would have if I had somewhere to put it is this rockin' turquoise stove! It's still at the salvage shop, waiting for the perfect gal to come along! It's the cutest thing...it's definitely turquoise (my photos looks a little on the powder blue side), electric with clock. Only $100...somebody please buy her!


Subscribe to:
Posts (Atom)